 |
| The Qbox Assembly |
 |
| QR Booth at Ironman Chattanooga 70.3 |
Since the box fits snugly to the frame, you have to get the right size. And you want the right color. Luckily this was right after I signed up for the Ironman 70.3 World Championships. As you know, Active makes you re-up on your USAT license if your current one expires before the race you are signing up for. So I did that and they sent you a $20 off coupon for Trisports in the email.
 |
| Autozone is your friend |
 |
| All the stuff in the package |
Since I can't just bolt on the slider bracket, I needed a way to affix the slider bracket to the rear of the seat tube. I had read a thread on Slowtwitch where they mentioned 2 sided tape, as well as 2 part epoxy. I thought the tape would be much easier, so I went with that.
 |
| Lid, Box and Slider Bracket |
 |
| Shot of the "T" Slot |
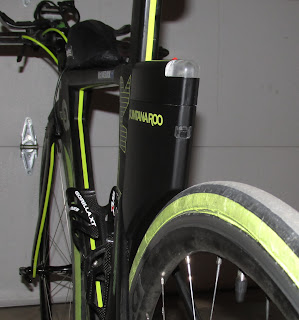
Then the "lid" also slides down the T slot and locks in by a clip into the box itself. The lid has a light on it. It has a little button on top that you can select in on solid, flashing slow, or flashing fast. Its not nearly as bright as the rear light I run with all the time so I probably won't use it.
I took the rear wheel off and hung the bike on my homemade bike stand. I cleaned off the back of the seat tube and frame to try and have the best surface possible for adhesion.
Now I put the tape on the back of the slider bracket. I used a pair or wire cutters and a razor knife to help cut the tape to the right length. I did not trim the sides of the 1/2" wide take as 2 strips fit pretty well side by side.
I didn't quite get the two pieces even, but I didn't want to pull it all off. I wasn't sure how well that would go, so I just went with it.
Looking at it after the backer layer was peeled off, it doesn't look too far off. Then I pressed it onto the back of the frame. This is probably the most critical part. Not just getting the height of it correct (that is not too bad). You do want to make sure you have it slid down as far as possible, where it stops against the seat stays. That way it will be tightest against the wheel. You also want to make sure that it is straight. And that is hard to tell when you just have the slider bracket on.
So at this point, I slide the box on to check and see if it was straight. It was a little off so I kinda pushed it over with the box attached until it looked straight. Then I decided to clamp it on there overnight to try and get good adhesion.
I had read that 75-80% of bond strength is achieved 24 hours after bonding. It is only about 60% right away. So I clamped it on Saturday afternoon and then went for a ride 24 hours later on Sunday afternoon. I did not ride with the Qbox on there, just the slider bracket.
I did put the box on and ride with it on Tuesday. That was about 8 hours short of 3 full days after applying the adhesive tape. 3M says that 95% of the bond strength is achieved in 72 hours.
Finally the next Saturday (a full week later) I finally put some items in the box while I rode. For me, the main purpose of the Qbox was twofold. Aerodynamics (the frame tests faster with the Qbox on) and storage. I didn't need a lot of storage. I just wanted to take my tire levers and my CO2 inflater and get them out of my top tube box. I want to be able to fit 3 gels in there for my half races.
 |
| Levers and inflator in there |
 |
| Tape over the levers and inflators |
Hopefully this will save me a few seconds at Ironman Augusta 70.3 from an aerodynamic standpoint and also the time it takes me to stuff gels in my kit (and remove them). For the money and time, it was actually pretty easy and well worth it. Plus, it makes Green Lightning look that much faster!
Please note: Quintana Roo does not endorse this procedure. It is better than drilling holes in your frame though!


